Template Builder
Introduction
As part of the "Google Summer of Code" program a Template Builder was created by Thomas Linowsky. The Template Builder is a tool that creates templates in a Web environment (browser) for eLML without you having to deal with XSLT or CSS. These templates are needed to transform your eLML lessons into one of the available output formats. Thomas Linowsky is currently working a newly rebuilt version of his Template Builder. Contact him directly if you have questions about that.
Features
- Create eLML layout templates in an easy to use WYSIWYG environment
- Multi-platform: runs on most operating systems and browsers (see below)
- Supports both HTML and PDF layout templates
- Preview your lesson directly within the Template Builder
- Manage (save/open) different layout template projects
- Multi-language (at the moment: English and German)
System Requirements
The tool was tested using the following browsers and OS:
- Firefox 2 on Windows XP
- Internet Explorer 7 on Windows XP
- Firefox 2 on Mac OSX
- Firefox 3 on Mac OSX
- Safari 3 on Mac OSX
- Firefox 3 on Linux (Ubuntu 8.04)
The Template Builder requires YAML installed within your "_templates" folder (at least version 2).
Download
We offer both a stable and a developer release (same as with eLML itself). Both versions are included in the tools-folder of both the stable and the developer release the eLML-core. You will also have to download YAML since the Template Builder is based on the YAML CSS-framework. If you want you can also download them directly:
- Download Template Builder
- Download YAML and put only the folder called "yaml" into your "_templates" folder. Read more about YAML and eLML here.
Installation
Once you downloaded and uzipped the Template Builder you should store the template_builder folder within your workspace. It does not really matter where the folder is located
on your harddisk but we recommend to put it within your workspace where your "core"
and project folder is located.
The tool can be accessed through the HTML-Page “template_builder/builder/builder.html”. When you open the page you will be asked if this page is confidential and if you
would like to trust it. Please click on “trust” otherwise you will not be able to
save your templates, and in certain cases, you might not be able to even start the
tool. You can also click ok and ignore the note informing you that the application
might be slow (if this warning should appear, depends on your hardware). In spite
of that, the Builder should function properly.
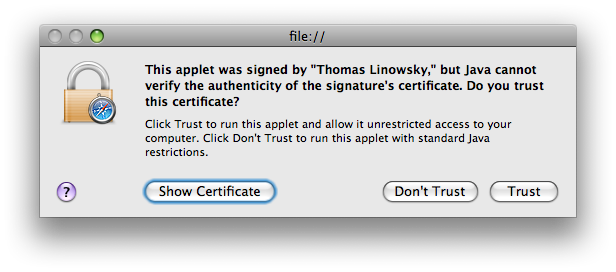 Trust the certificate to be able to use the Template Builder
Documentation
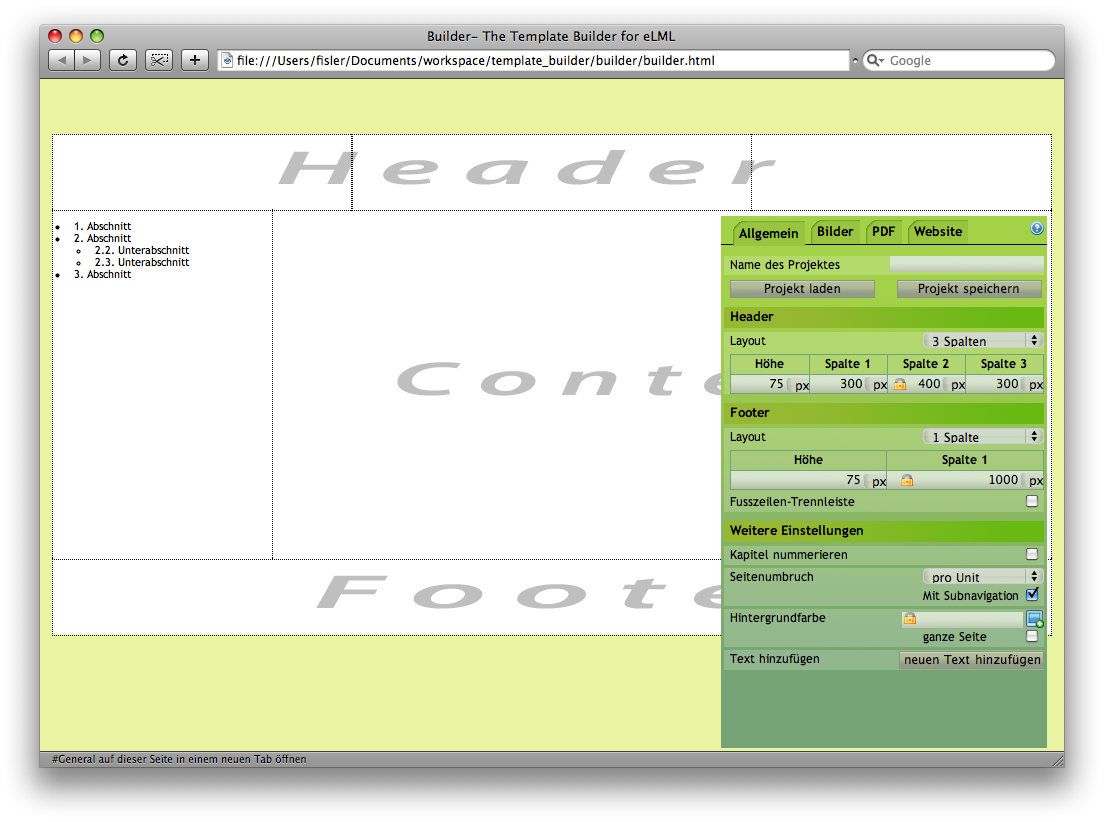 Screenshot of the Template Builder shown in Safari WebbrowserThe Template Builder consists of two main parts:
- The preview page that represents the appearance of the final layout.
- The control section called "builder" where you can modify the settings.
The Preview Page
The background can also be seen in the preview page. The default background is the same as the eLML-layout but you can always modify it. The theree main parts header, content and footer are visible by default. If you dont need a header or footer you can select 0 in the height settings under the “General” tab. The default settings of the area containing these three parts are:
- Width: 1000 pixel
- Height: 768 pixel
The height of the final layout will be adjusted to the content automatically later on.
The Builder
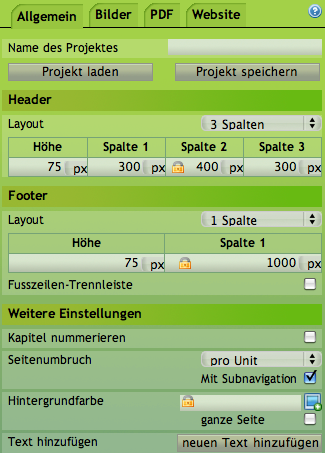 You can move around the "builder" window according to your needs. The control section
consists of four tabs:
Tab General
In the "General" tab you can modify the general settings of the layout template:
- Project settings: In the field “Name of the project” you can write a name for your template. Please be careful: Templates with the same name will be overwritten! With a click on “Save project” you can save your project and later load it using "Load project" to continue editing.
- Header and Footer settings: Here you can set up the number of columns of the header as well as adjust the heights and widths. The width of the column can also be adjusted using the dashed lines in the header. By modifying the number of columns all the adjustments in the header will be lost; therefore, you are advised to first set up the number of columns before you proceed with the rest of the settings. Columns that cannot be directly adjusted are write-protected (lock symbol). If you would like to change these, then you must change the other columns first.
- Additional settings: Here you can adjust settings such as the chapter numeration or pagebreal level (overriding the configuration file!). In the field “Background color” you will notice the name of the actual element you have chosen by clicking on the preview page. That allows you to select elements on the preview page where you want to modify the background color. The checkbox “Whole page” marks the whole page but not the background. First you have to select an element by clicking on it in the preview window. Then click on the icon at the side of the field “Background color” and a table with colors will open. A click on one of these colors will change the background color for the selected element. If you click on the “Add text” icon a editable text element will appear on the preview page. This element is represented in the final layout always relative to the clicked position on the preview-page. The generated element can be modified in terms of the width and length thereby changing its font size.
Access the other tabs by clicking on the tab-name (Pictures, PDF or Website).
Tab Pictures
In this tab you can insert pictures, modify their sizes and move them accordingly.
Actual image: By clicking on the picture the settings will be loaded. The file name in the field “Actual image” illustrates the picture that is being selected.
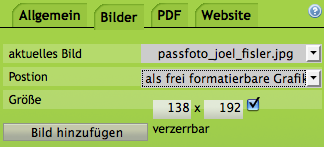 Insert picture: By clicking on the button you can select the picture you would like to insert. Once
the picture has been loaded, you will be able to see on the left side of the window
of the builder the actual size of the picture. Now you can drag the picture in the
preview element of your choice in order to insert it as the background. The chosen
element will appear as it is being dragged with a blue background color.
Background picture: Pictures that are inserted through drag and drop will be displayed as standard background pictures. They will be illustrated according to their actual width and height of the preview page element. If they are smaller than the element, then they will be repeatedly displayed. All of this can be modified with help of the settings fields that appear in the builder.
Floating pictures: If you wish to have floating pictures instead of background pictures then you can set this up by clicking on the field “Position” on the builder. After selecting this possibility you will have several other setting possibilities, such as adjusting the length or the width of the image. You can adjust the length or the width of the picture. It is also possible to maintain always the same scaling. By clicking on the “Position” field you will also be able to re-insert the picture in the background.
Deleting pictures: By pressing “Delete” or by using the combination “Alt+Delete” you can delete the picture you selected.
Tab PDF
 The PDF tab lets you ajust the settings of your PDF layout. It is still in beta status
and not "bullet-proof" but you might want to try it out and and let us know if it
works.
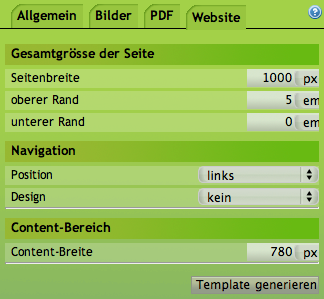
Tab Website
In this tab you can change those settings that are especially and/or are only used when creating HTML layout templates (online.xsl).
Total size of the preview page: Set the width and margins of the preview page. Additional empty space is always filled with the background color defined under "General". The values can be inserted either in pixel (px) or in font size (em).
Navigation: Set the position and the design of the navigation. If “Up” or “Floating” are chosen the Template Builder adds a default design to the navigation. The design can of course also be modified.
Content section: Depending on the content a minimum width may be required. You can specify it in this section. Other values that are affected due to this change are corrected automatically.
The code preview window
After creating the templates a preview of the templates and CSS-Files will be shown. These can be manually copied, edited and saved. By clicking on the Menu-list you can change your view between the XSLT and the CSS Preview.
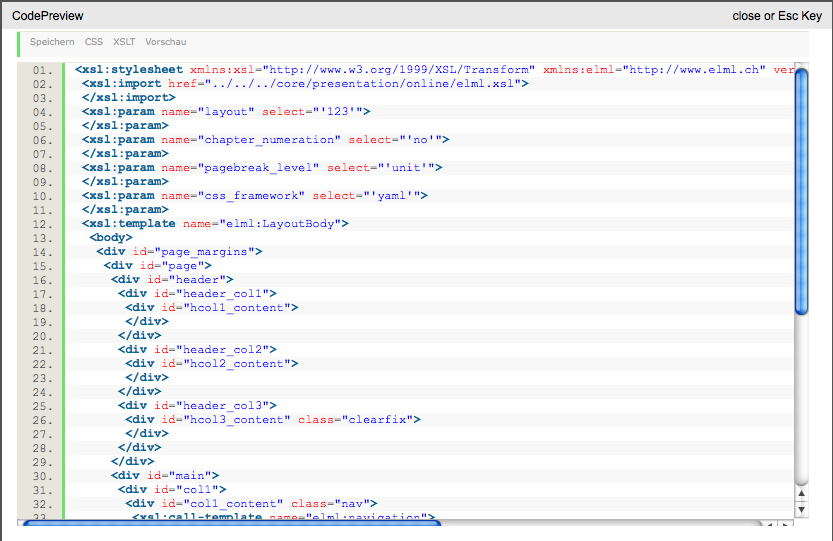 By clicking on the “Save” button you can save both documents in the folder with the
template names. Please be careful: Previously saved templates or files with the names
“online.xsl” or “elml.css” will be overwritten. By clicking on the “Close” button
you will close the code preview and the preview page will be shown again.
Click on “Preview” and you can choose a lesson that will be transformed with the help of your created template.
Support
The author of the Template Builder is wokring a totally new version so he offers only limited support for the old version:
- Need help? Contact Thomas Linowsky
- Found a bug? Submit a bugreport (choose "Template Builder" as category)